What You Can Do in the Viewer Detail Dialog
Click on Viewer Name or Comment in the Comment Viewer
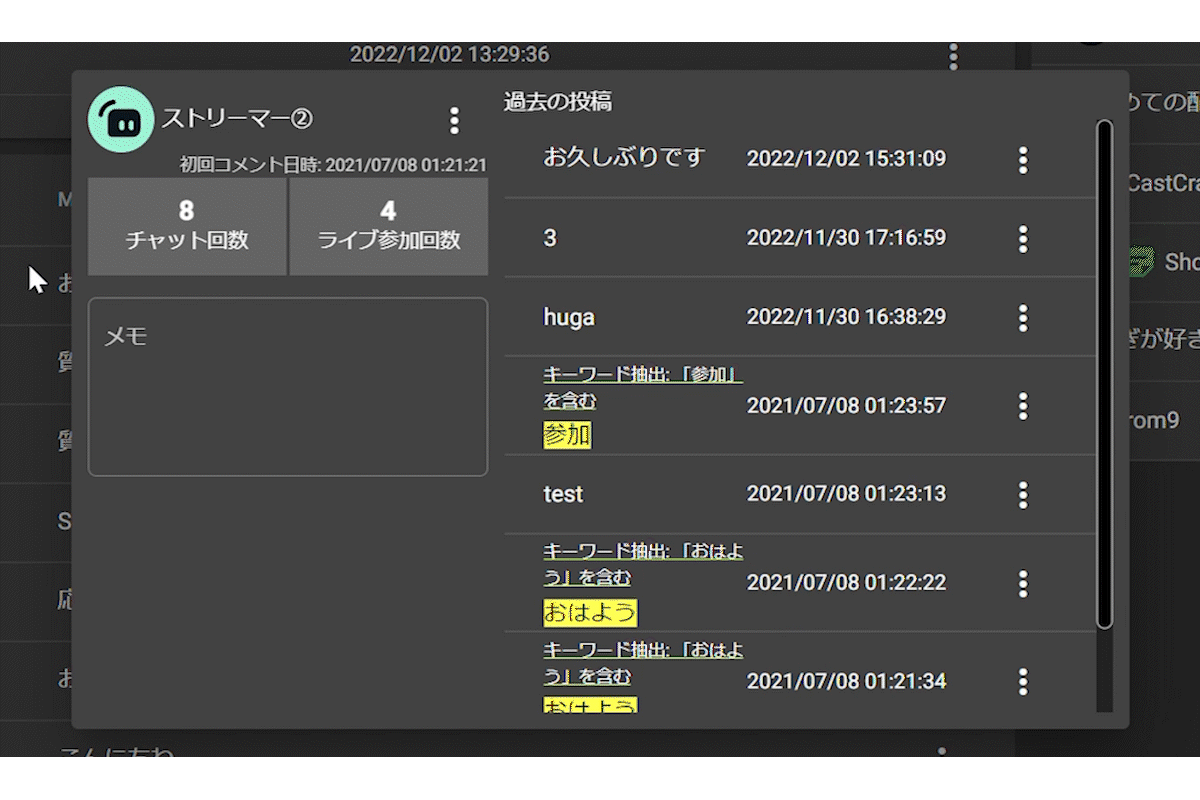
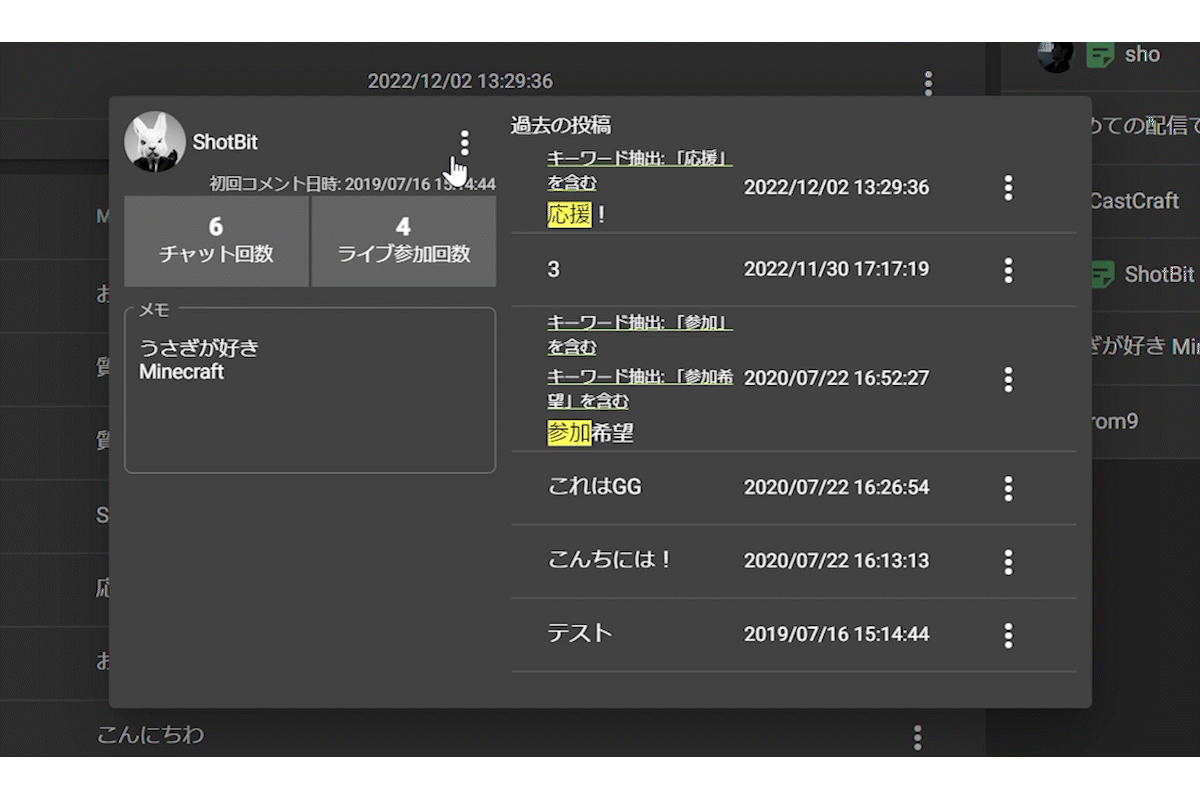
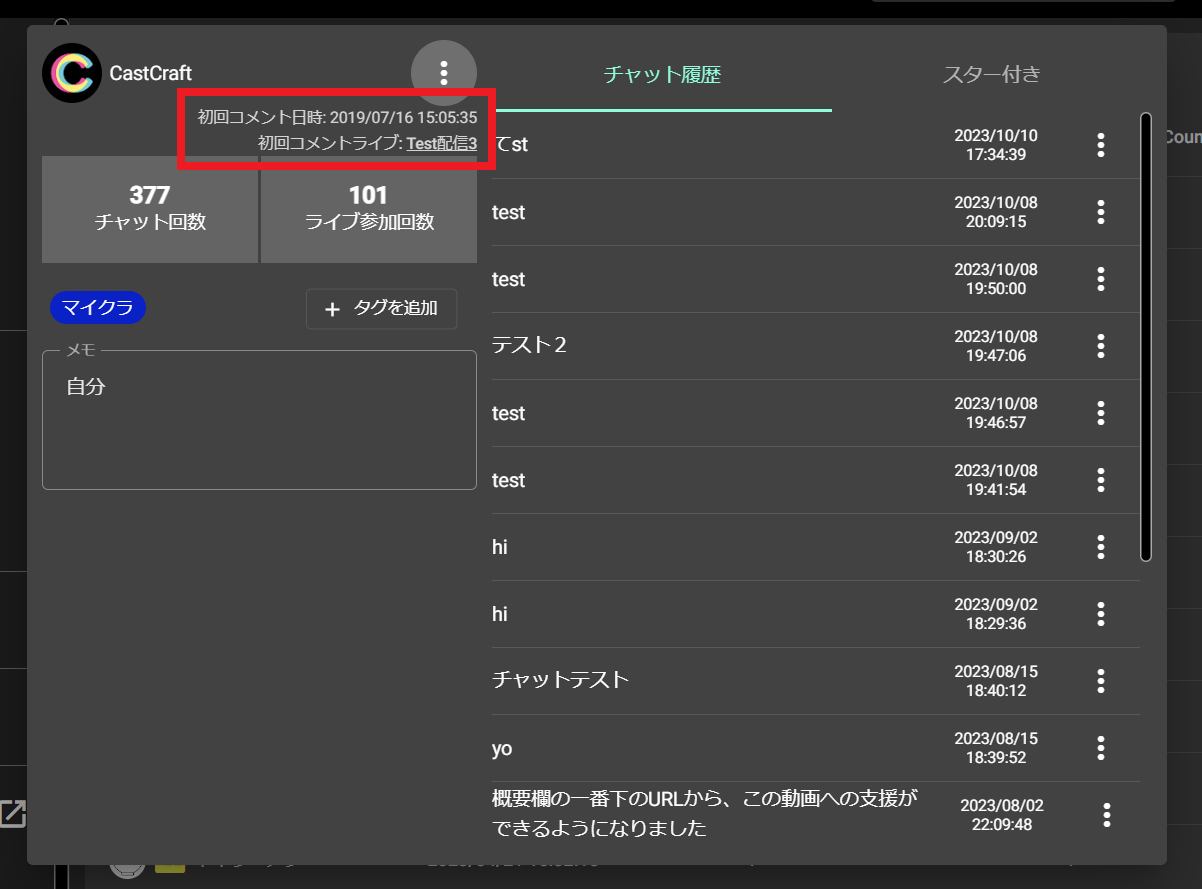
Clicking on a viewer's name or comment in the comment viewer opens the viewer detail dialog.
What You Can Do in the Viewer Detail Dialog
Within the viewer detail dialog, you can:
- Review the comment history of that viewer
- Check the viewer’s past usernames
- Add personal notes about the viewer
- See stats such as number of participations
- Jump to the viewer’s YouTube URL
Display Viewer’s Name History
Hover over the viewer’s name in the upper left of the dialog to see the history of their past usernames. (Note: name history before using CastCraft is not available.)
Go to the Viewer’s YouTube Channel
Use the menu next to the viewer’s name in the upper left of the dialog to jump to their YouTube channel.
See the First Stream Where the Viewer Commented
You can check the stream where the viewer first left a comment—making it easy to understand what brought them to your channel.
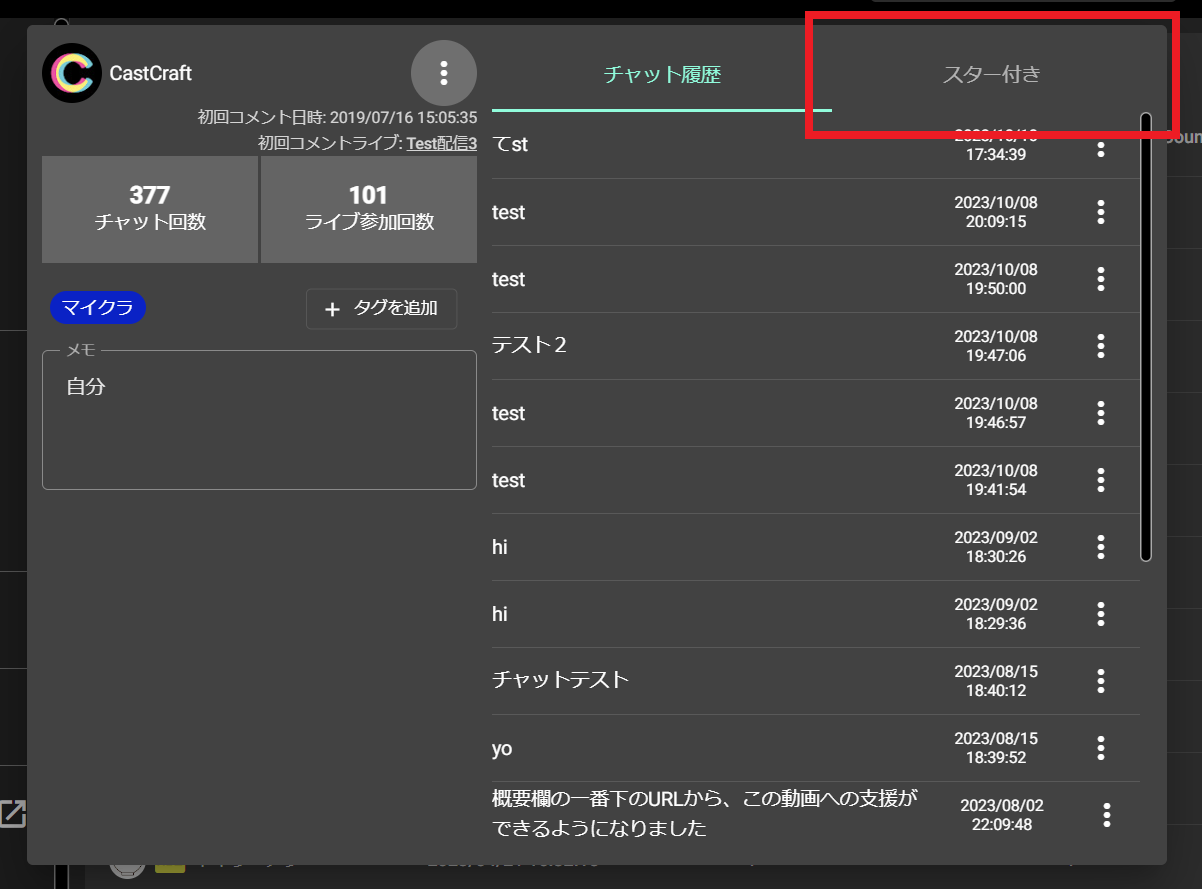
Star Comments (for Archiving)
You can star key comments from the viewer and archive them under the “Starred” tab.
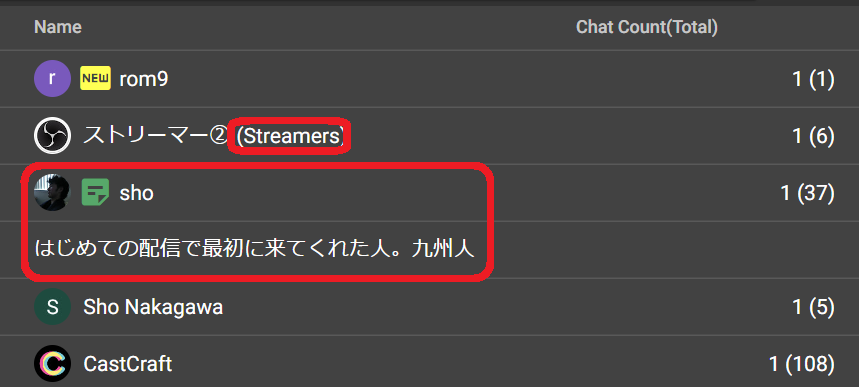
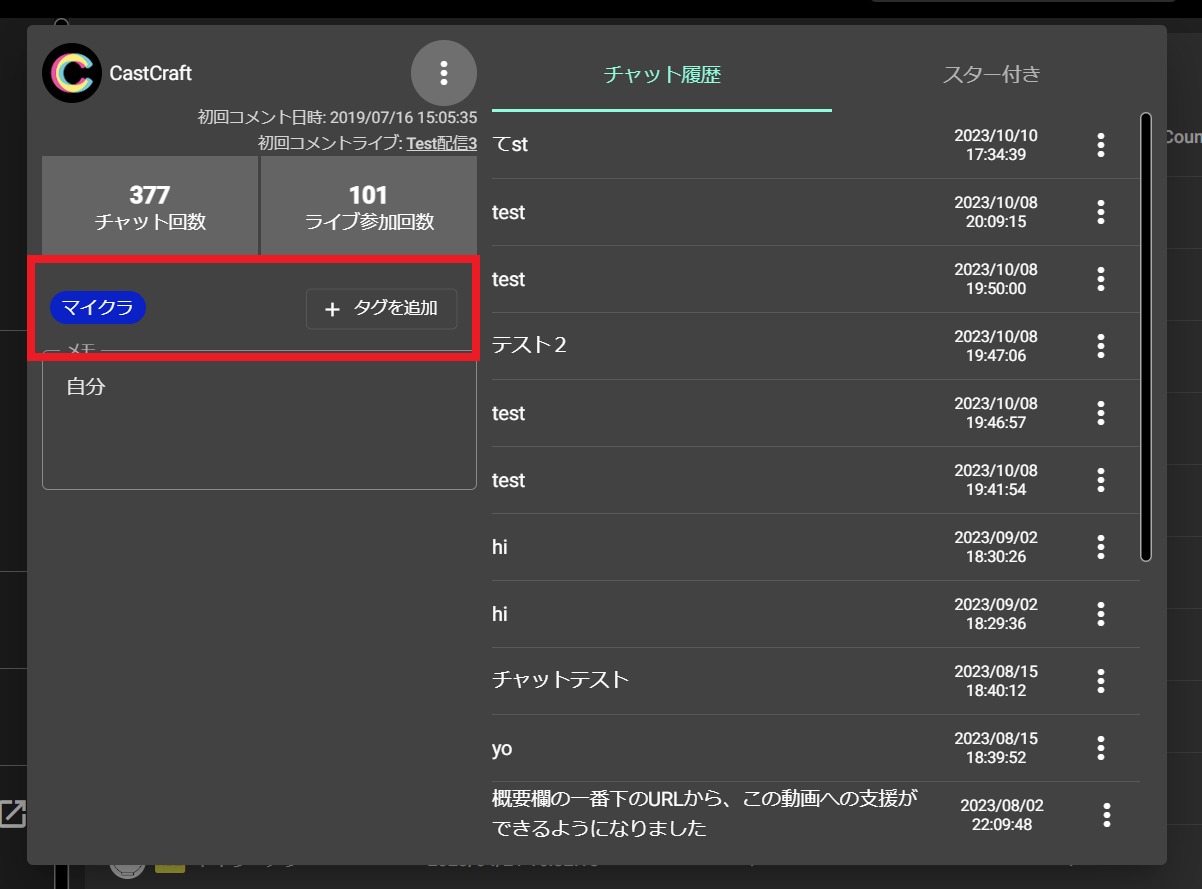
Tagging Viewers
You can assign tags to each viewer and display them in the viewer list on the Live Dashboard.
Step 1: Add Tags
Open the viewer dialog and add tags to the viewer you want to label.
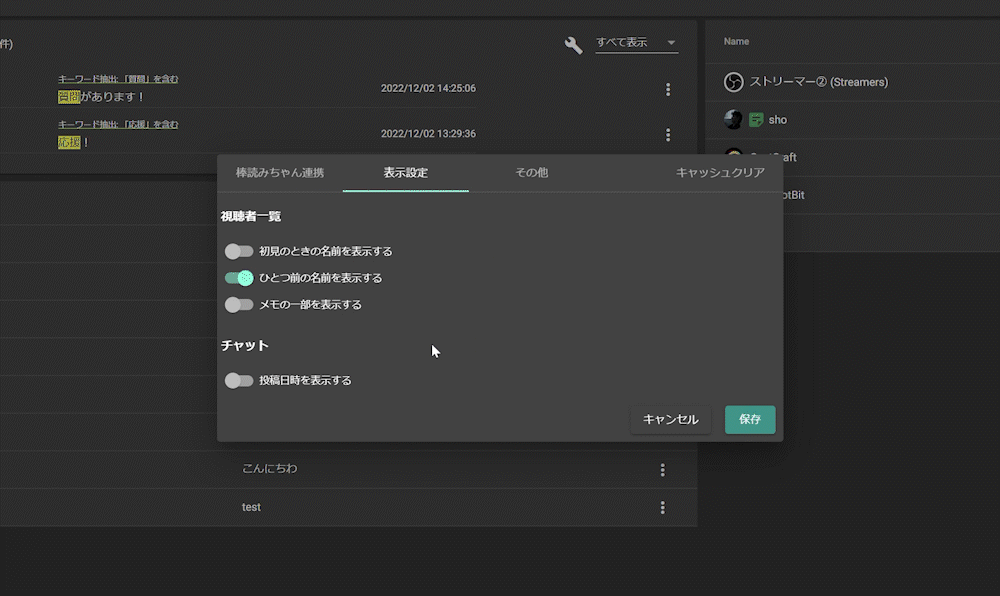
Step 2: Display Settings
Go to “Settings” > “Display Settings” in the top left of the app and check “Show Tags” as shown in the image.
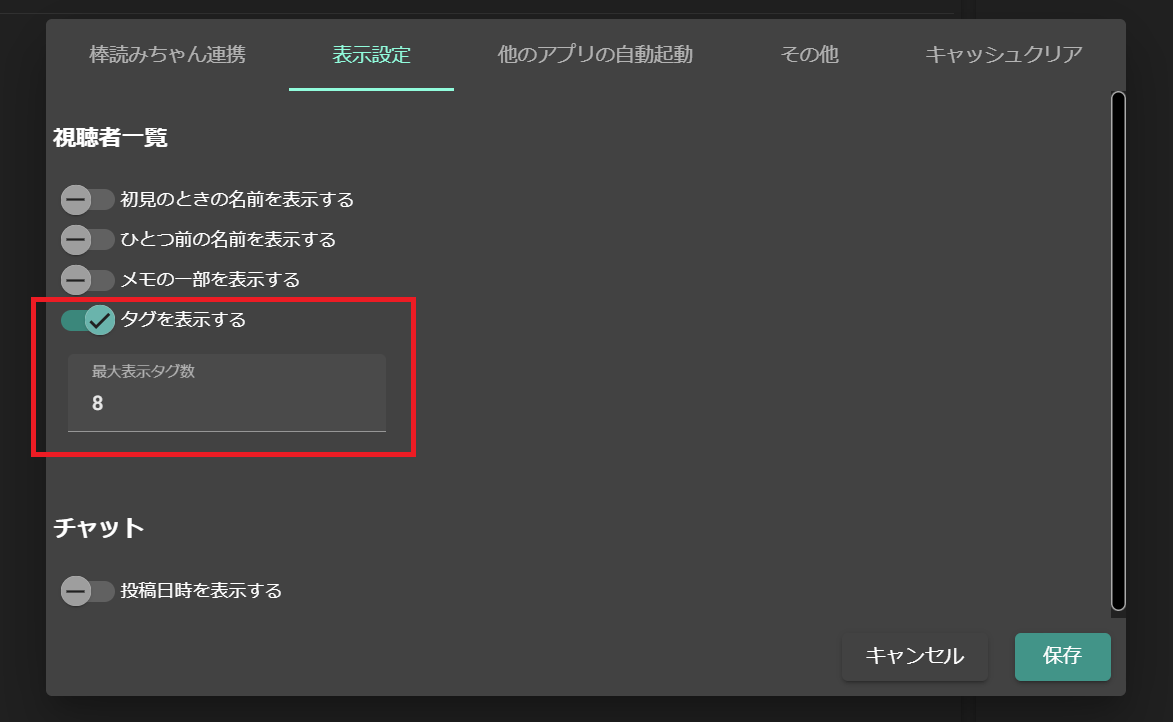
If you assign multiple tags to a single viewer, tags will appear on the Live Dashboard up to the number specified in “Max Tags to Display.”
For example, if “Max Tags to Display” is set to “1,” only the first tag will be shown.
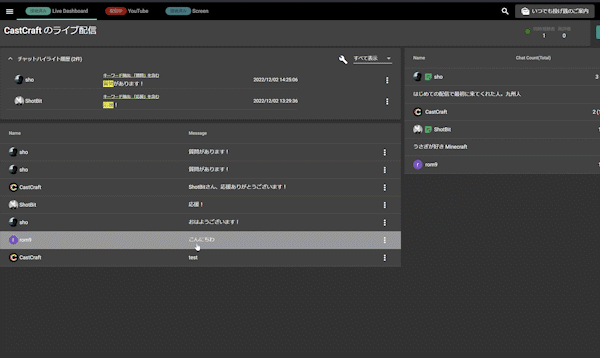
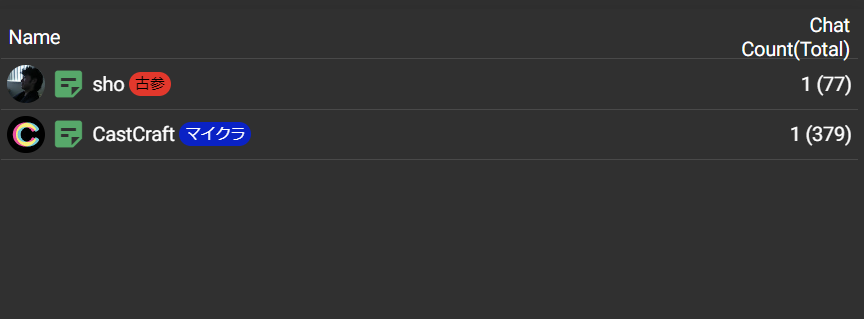
Step 3: Check in the Live Dashboard
When the viewer comments during the stream, their tag will also be displayed in the viewer list on the right side of the Live Dashboard.
Auto-Display Viewer Info on the Live Dashboard
As partially noted in the tag section above, you can show viewer details like:
- Past usernames
- Notes preview
- Tags
without clicking the viewer dialog, directly in the viewer list on the right side of the Live Dashboard.
You can configure this in the following guide:
Select "Display Settings" from "Settings" at the Top Left of the Desktop App

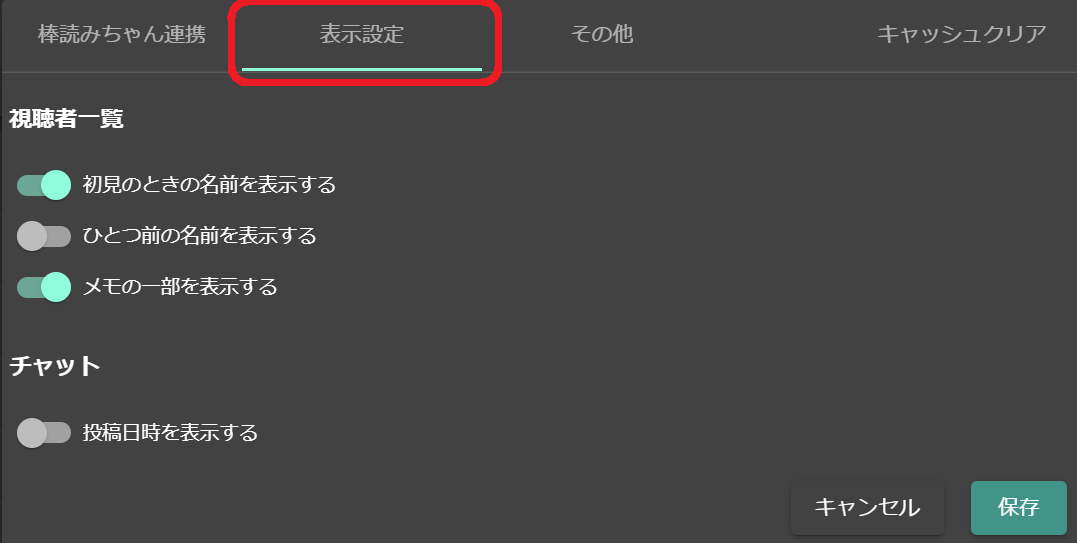
Enable Each Checkbox
By turning on each checkbox, you can display the viewer's past names and preview notes linked to them in the participant list on the right side of the comment viewer.