Create On-Screen Effects That React to Chat
Setup Guide
1. Install the CastCraft Desktop App
First, visit the official CastCraft website and download the desktop application.
Double-click the downloaded file to begin installation.
2. Log In
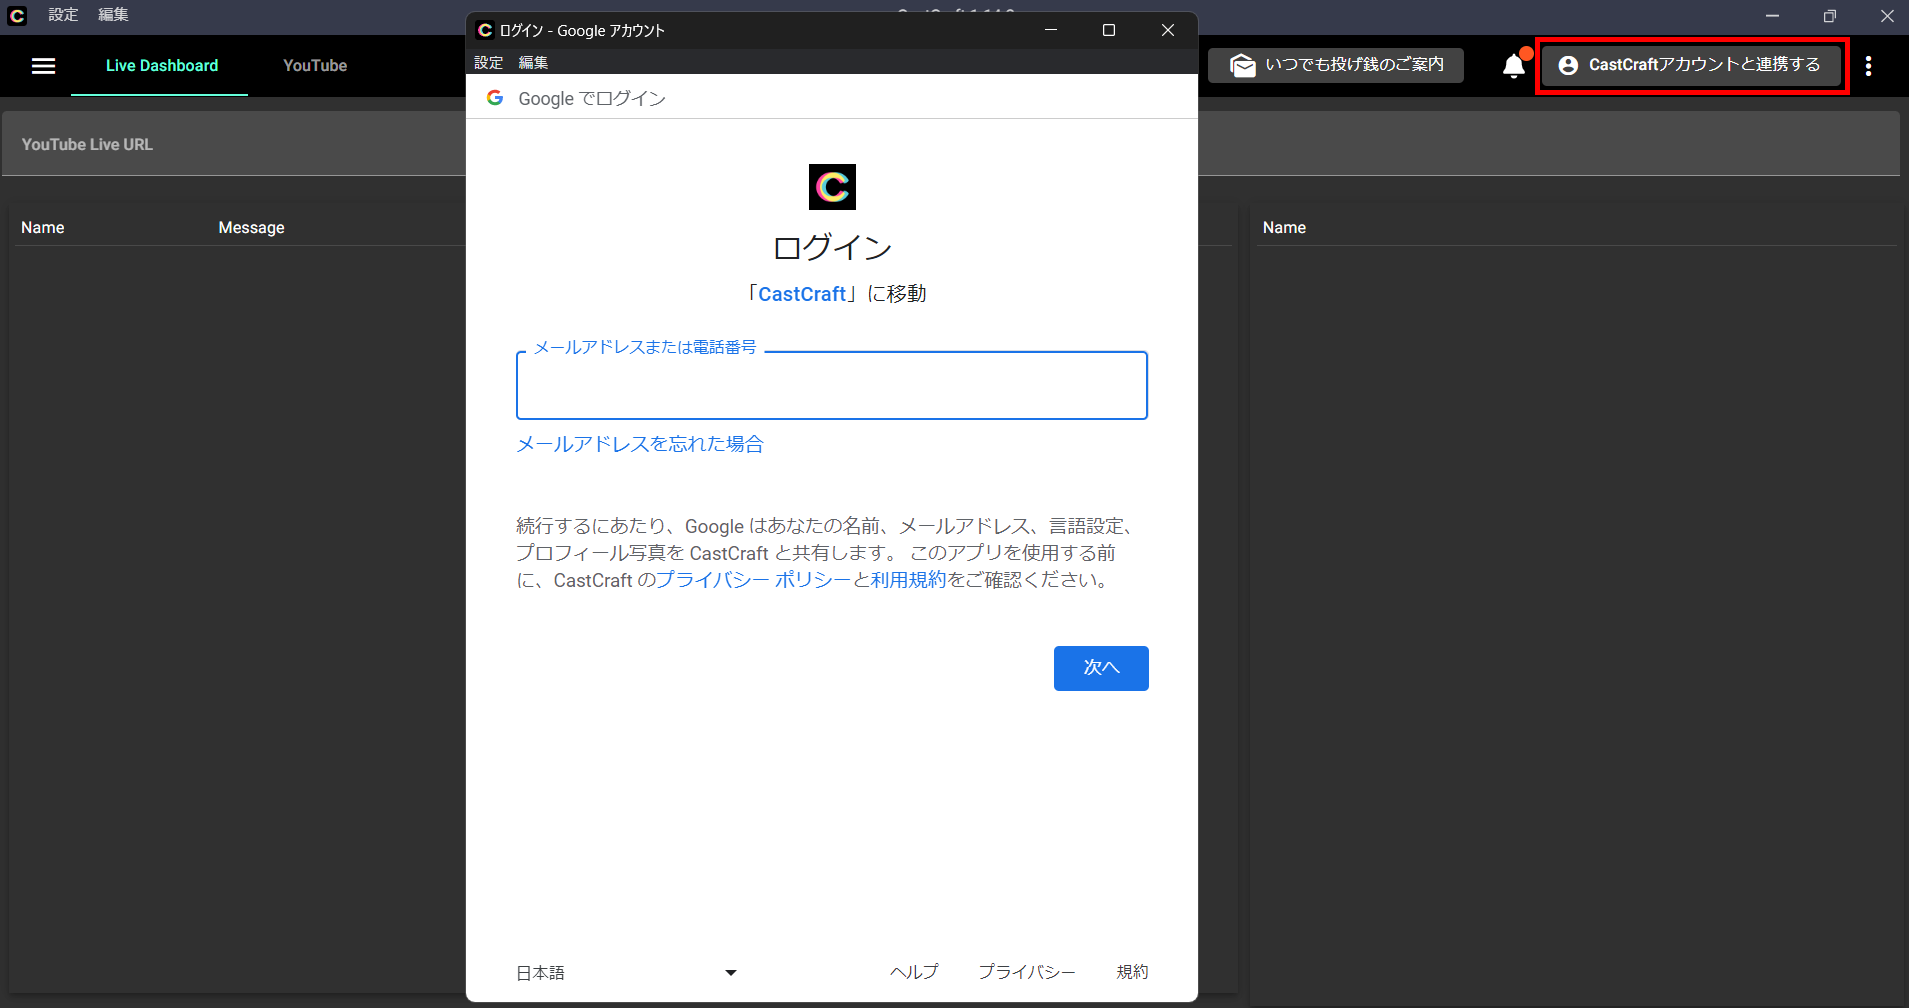
After launching CastCraft, click the “Log in to CastCraft” button.
Be sure to log in using the YouTube account that will be streaming.
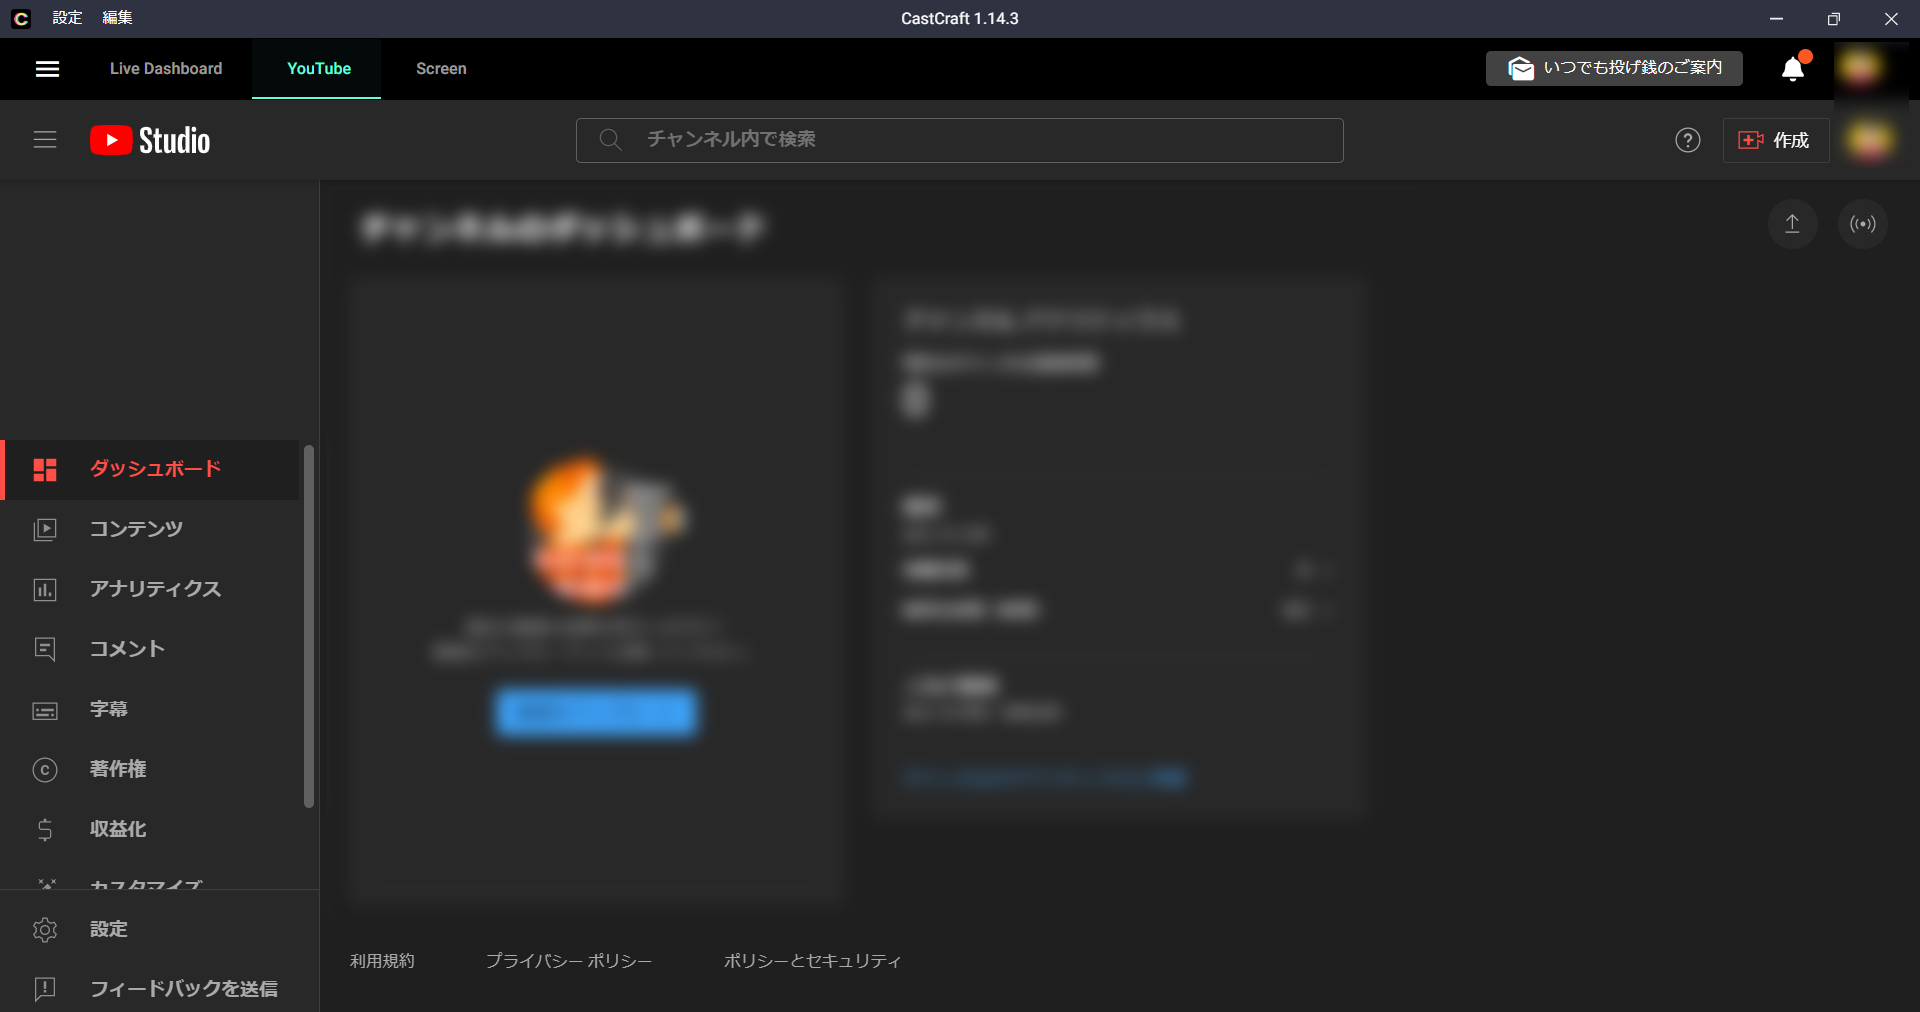
Switch to the “YouTube” tab in CastCraft and confirm that YouTube Studio is displayed.
If a different YouTube channel is shown in the YouTube tab, click the icon in the top-right of YouTube Studio and switch to the correct account.
3. Install the Screen Feature
The Screen feature requires additional installation. Download it from the Screen tab in CastCraft, then double-click the installer from your Downloads folder.
Once the Screen tab shows that it’s successfully launched, installation is complete.
(Note: the first launch may take time.)
4. Add Screen to OBS
In OBS, add a “Video Capture Device” source and select “CastCraft Screen” as the device.
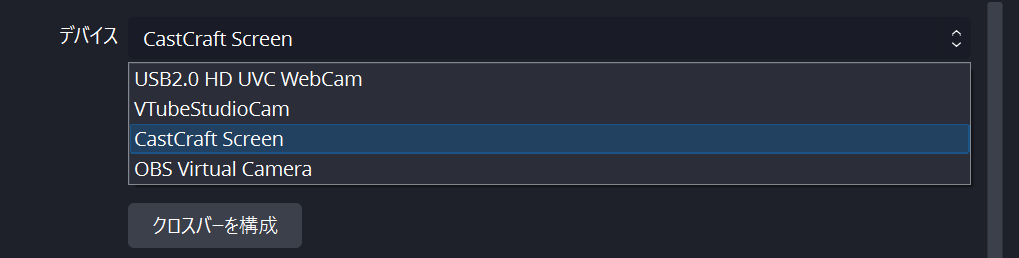
If "CastCraft Screen" does not appear, try using NDI Output to OBS
5. Set Up Interactions
Click the “Screen” tab inside the CastCraft app to launch Screen.
(The first launch may take time.)
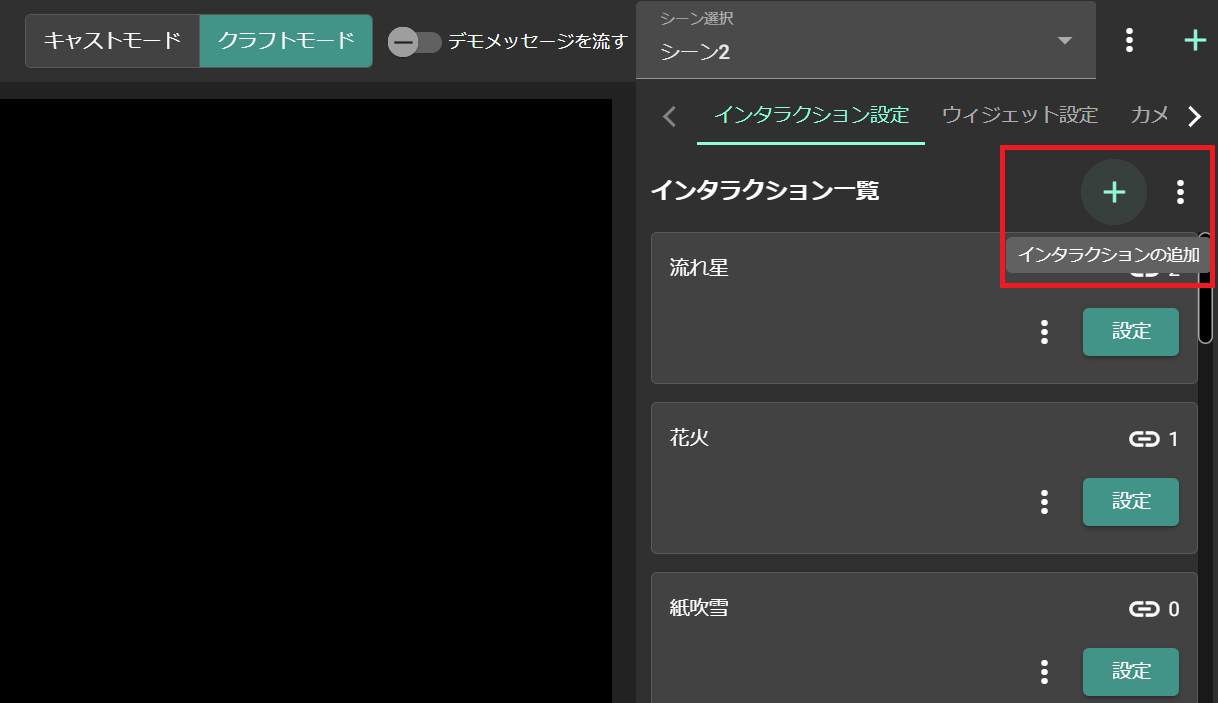
After launch, switch the top bar to “Craft Mode.”

Then select the “Interaction Settings” tab.

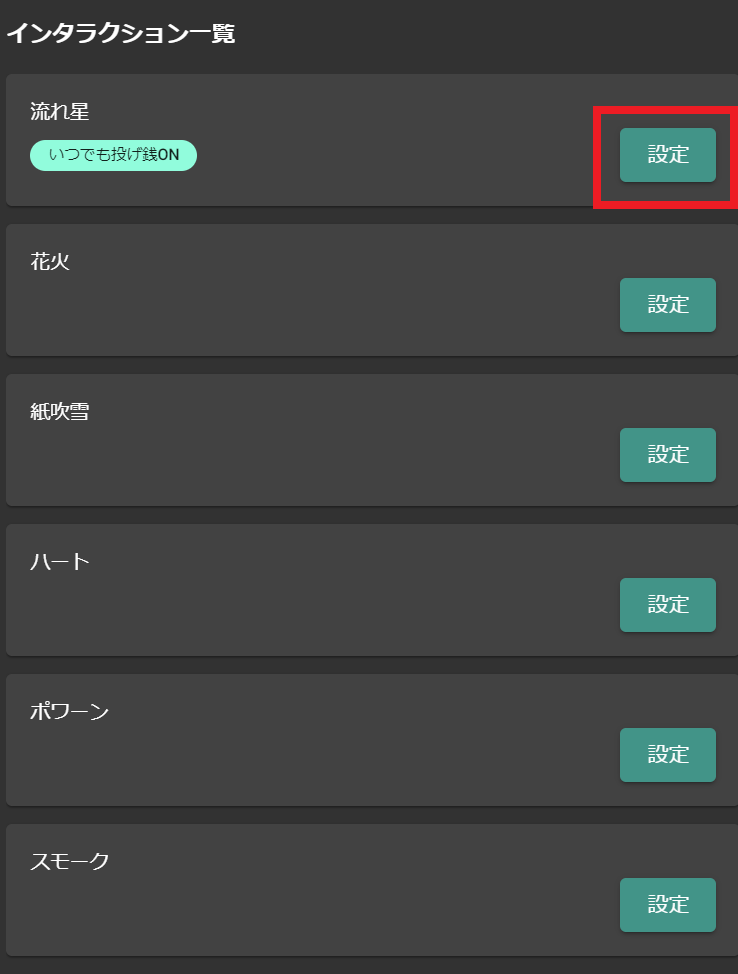
Click the “Settings” button next to the effect you want to configure in the Interaction List.
If you want to add effects not included by default, click the "+" button next to “Interaction Settings.”
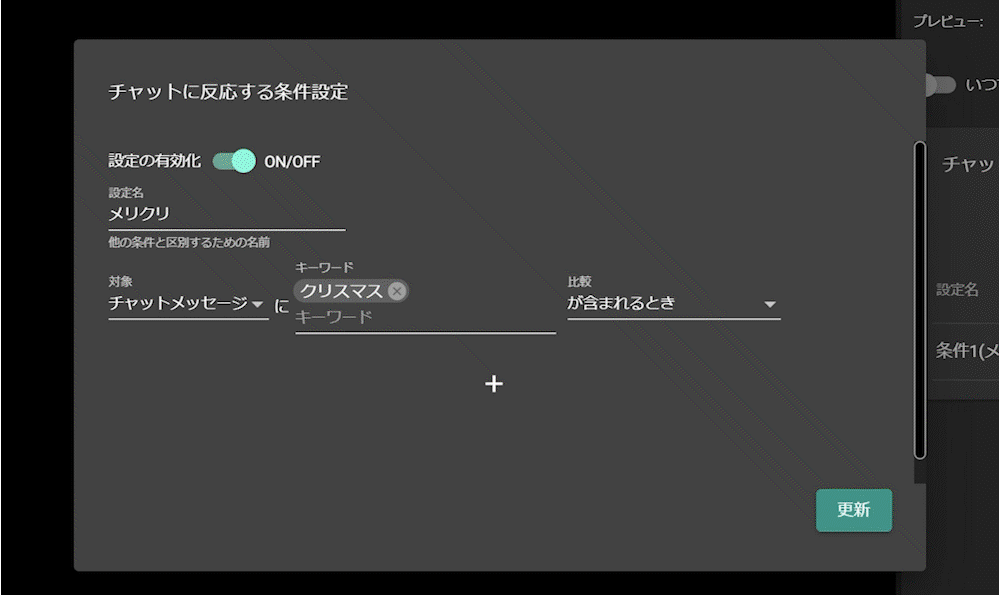
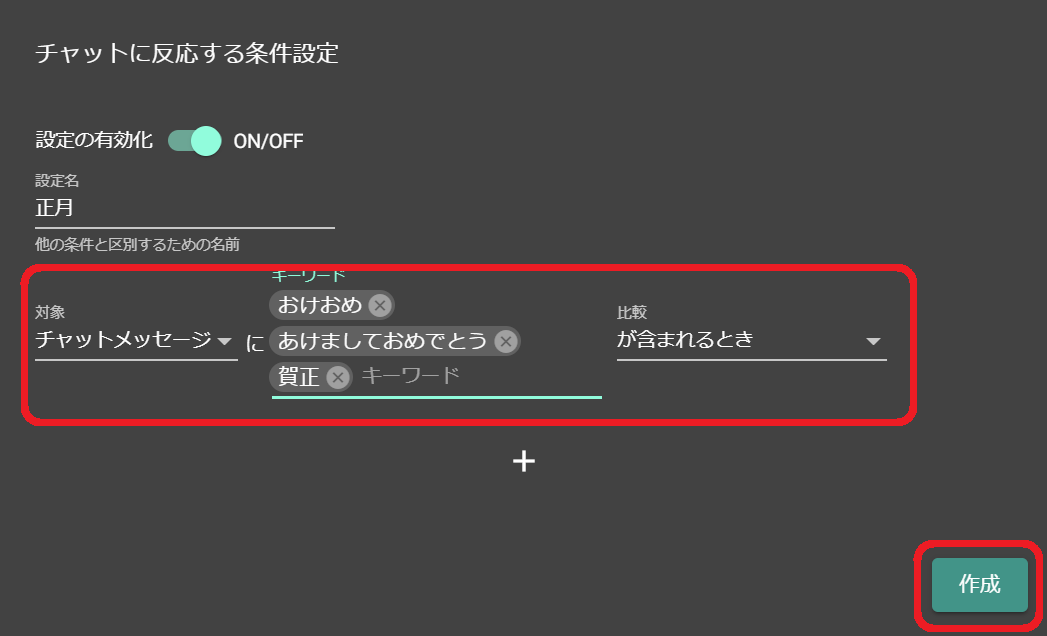
6. Set Chat Trigger Conditions
You can configure chat-based triggers, such as keyword match or comment count, for each effect.
Click the “Add Condition” button under “Chat Trigger Conditions.”
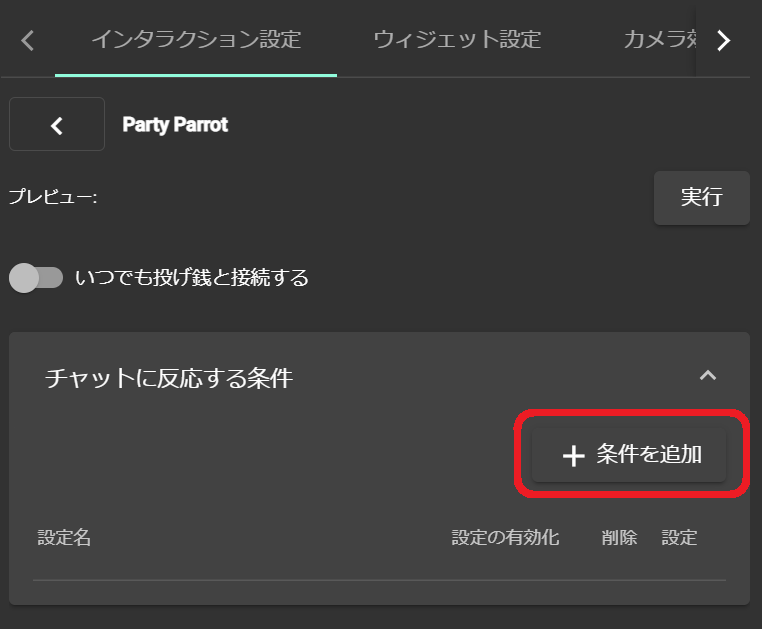
Fill out the condition details and click “Create” to set how and when effects should appear based on chat behavior.
Using It During Your Stream
7. Launch Screen Before Streaming
To display effects with Screen, launch the Screen tab before going live.
8. Start Your Stream from the “YouTube” Tab
Go to CastCraft’s YouTube tab and begin your stream.
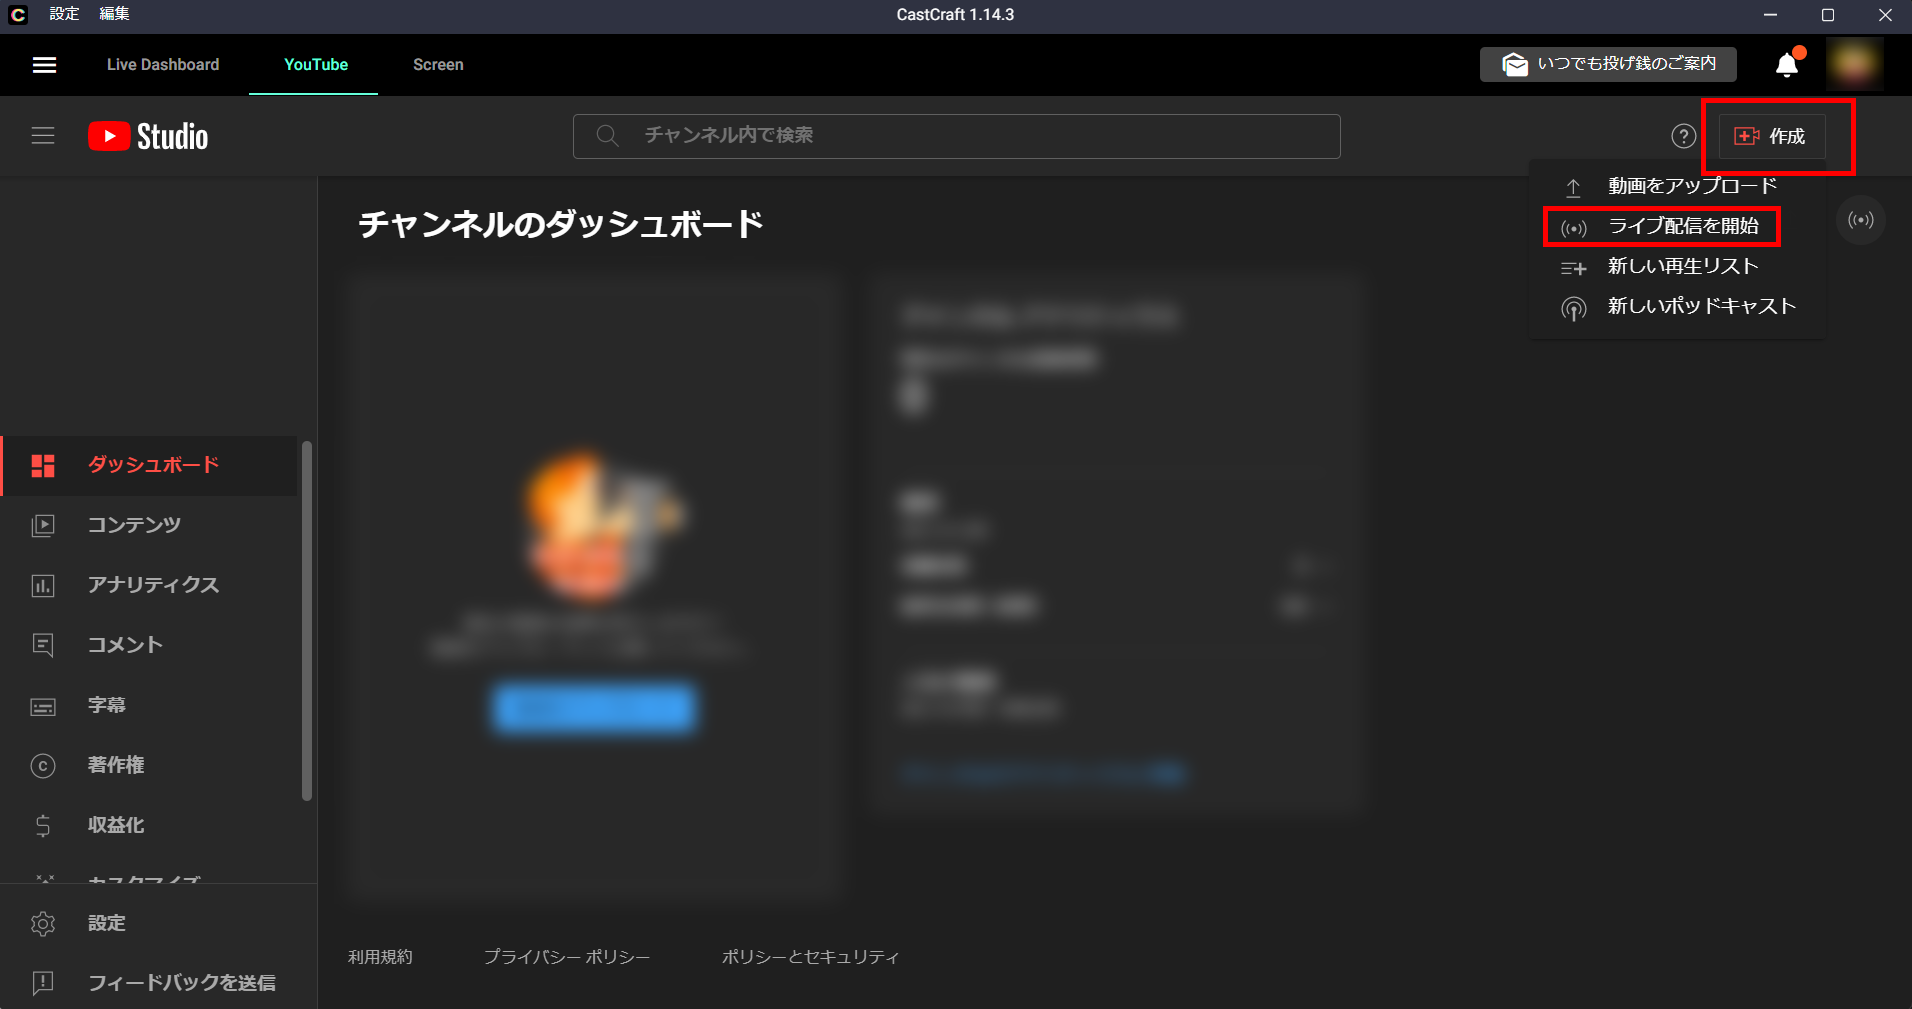
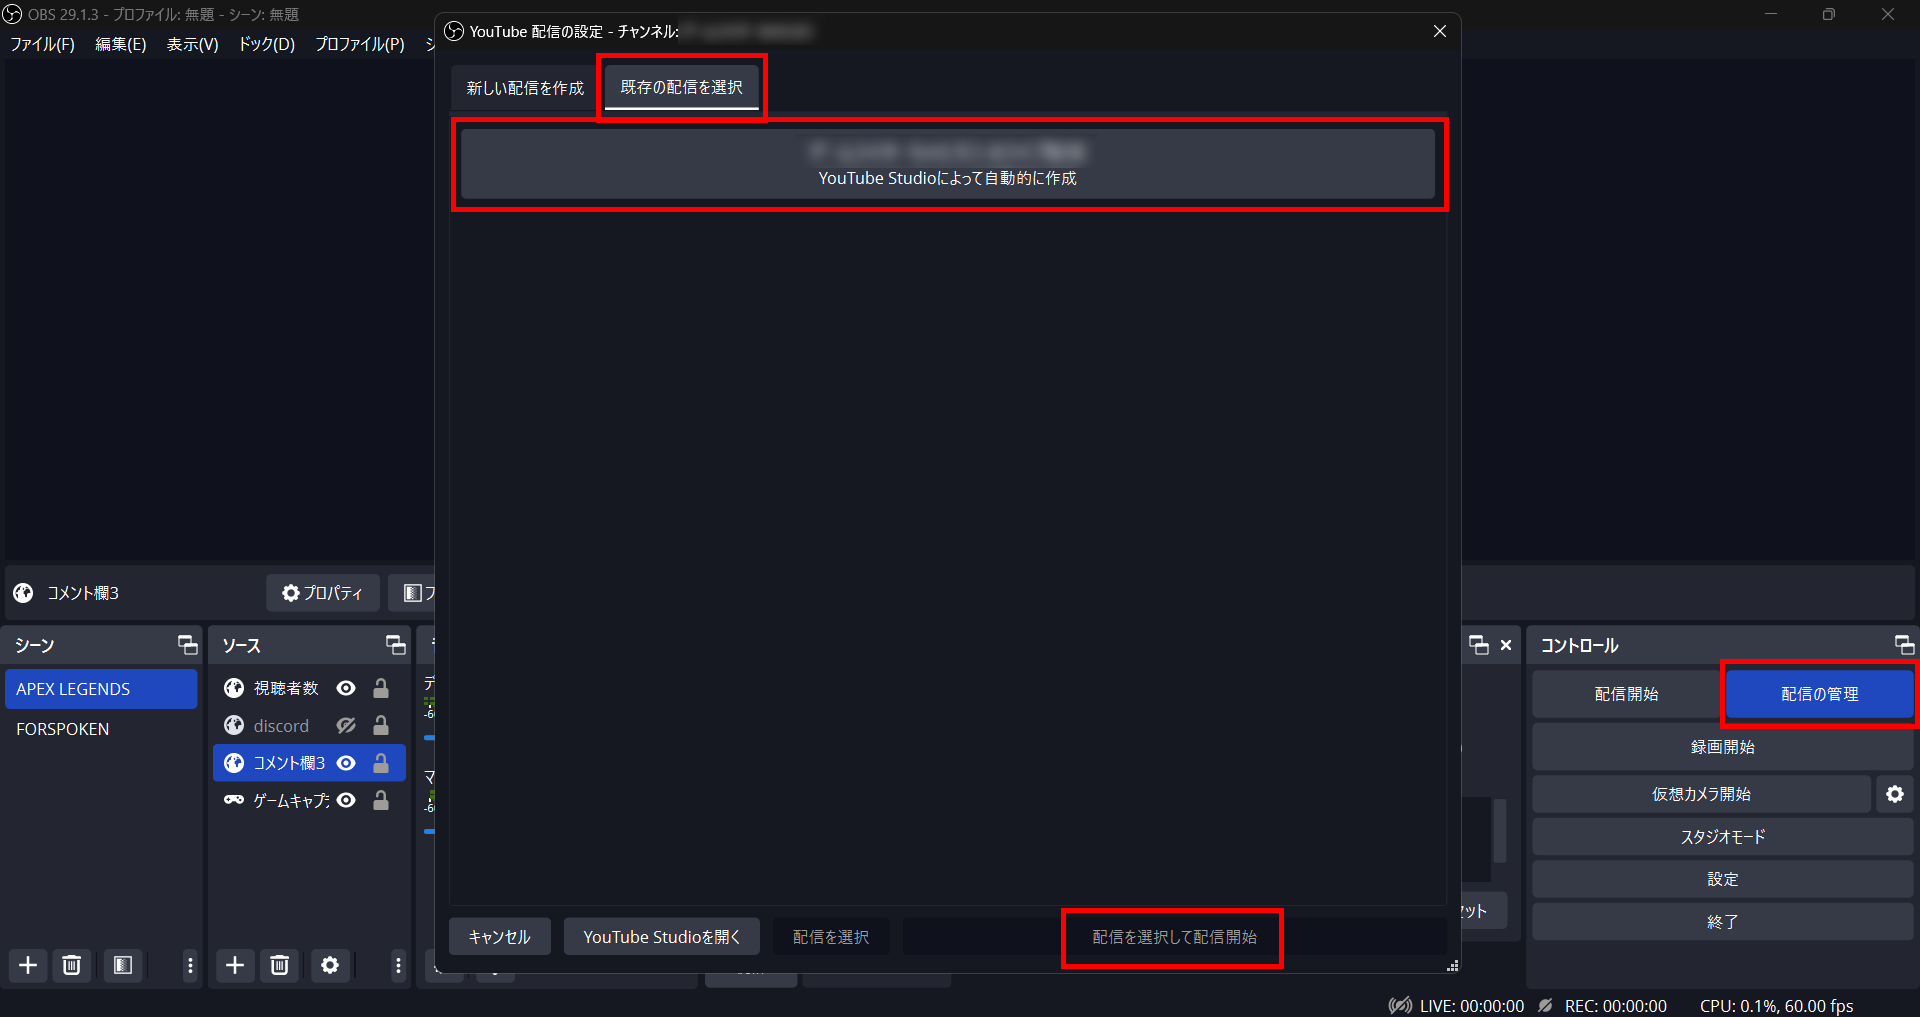
Then, start your stream from your broadcasting software (e.g., OBS).
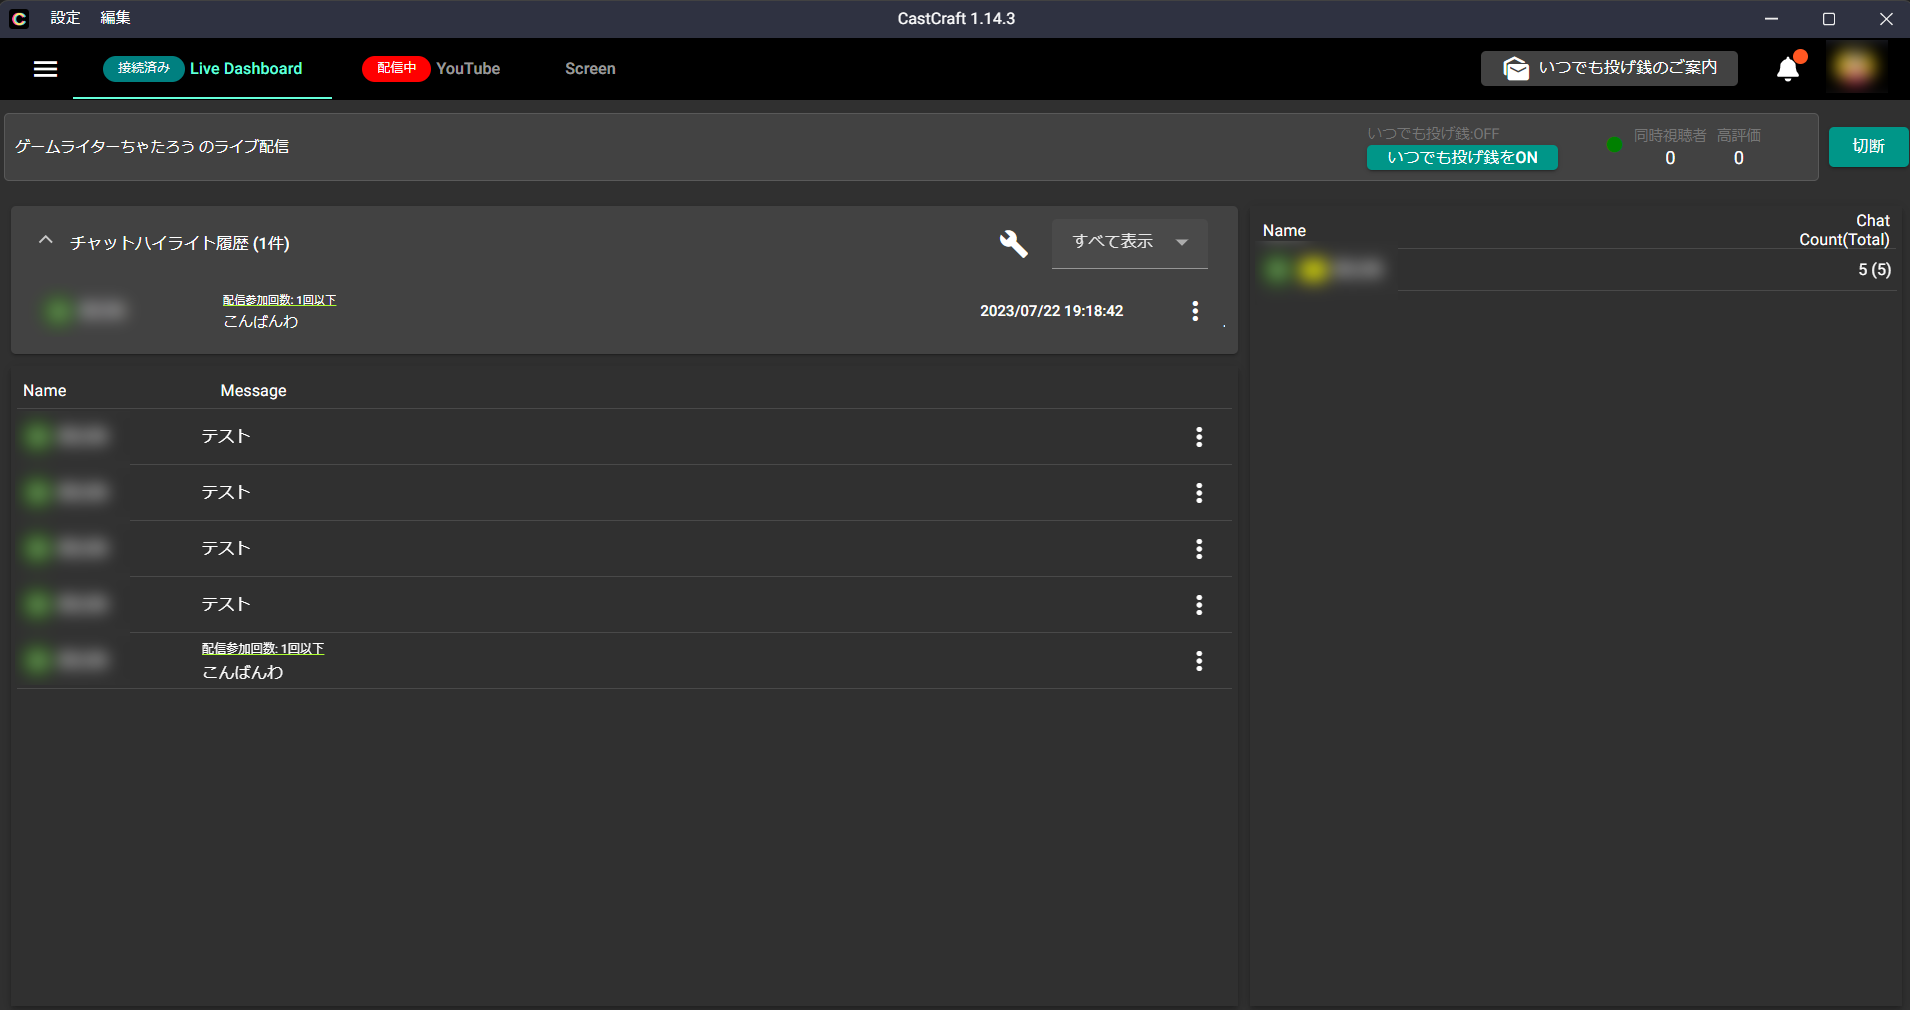
9. Connect to the Stream via “Live Dashboard”
Click the green “Connect to Stream” button in Live Dashboard.
Capturing comments here is required to enable most CastCraft features.